One of my favorite blog - Chic Steals - has a wonderful How-to and a fabulous Give Away going on right now! Stacie from Stars for Streetlights provided a How-To on Carly's blog which involves tranforming a beautiful scarf into an equally beautiful vest. The best part? Not only do they share the secret on how to make this awesome piece, but they are having a give away to win the scarf! so head on over and enter; I'm going to!
Picture

Win This!

 
I had won some fringe in a contest a year or so ago and decided to finally put it to good use. I ran out to Forever 21 and I bought myself two tanks: 1 in red and 1 in black and I put my fringe to work!

Picture
I handstitched the fringe on, although you could just as easily use a machine. On the black tank-top I layered 4 strips of the white fringe around the kneck. On the red tank top I layered two strips of the black fringe in a diagonal down the shirt. I unfortunately didn't have enough of the black fringe to keep going, but I would love to add another strip or two to fill it out!
Picture
Although I won my fringe from a company no longer around, you can get the same type of chainette fringe from Jo-ann's. The fringe is only about $3!

I'm hoping to use fringe some more in the future! I would love to make a shirt with fringe sleeves, or a skirt covered in fringe. There are so many great uses for fringe. Fringe, Fringe, Fringe! It's my new favorite craft piece!
 

Flowy Flower Top

Picture
I had some lovely flowers in pink and black and I had a vision of puffy sleeves! This is what I came up with!
Picture


First I used my newly posted technique on how to transform a tight t-shirt into a flowy one. Once the shirt had the appearance that I wanted, I cut out strips of my flowers and arranged them in a formation I liked, pinned them down and then hand stitched them on. I'm really happy with the final outcome! Now I want to see what else I can stitch onto my shirt sleeves! Any suggestions?


Boho Bag

Picture
I am very, very sad. So deeply sad, and I will tell you why: One of my oldest, dearest, and bestest friends is leaving on a plane this friday for a three month stint in South Korea. In honor of her exciting trip, we had a going away / birthday party at the Olive Garden (YUM!) last saturday. While plotting the perfect bithday / please-don't-leave-me-i'll-miss-you-too-much gift, I found this lovely, tribal-y looking fabric and decided to make a boho bag for my friend! This is the how-to for the funky bag (which I am so HAPPY with!). I might have to make myself one!
 
Picture
For those of you who know me well, you know that one of my favorite stores of all time is Sal Val's! I love the idea of taking a piece of "junk" or "trash" and turning it into a gem! most of the time I don't edit the clothing I buy because I find just the right piece looking just the way I want it, but every once in a while I come accross a piece which needs some total TLC! Such was the case when I stopped off a the ole' Army and bought myself some new wardrobe pieces.
While I was digging throigh the racks of  jewels I came a ccross a black, long-sleeved, maxi dress with some lace detailing. I instantly loved the detailing and tried it on to discover that it FIT! Alas, the long sleeves gave the appearance of a nightgown, but I was not dismayed, I decided to take the garment home and give it a little TLC!
Picture
I took the dress home and snipped off the sleeves, but I loved the lace detailing so I pulled off the lace at the ends and re-stitched it back on to the dress, leaving the top looking like this:
Picture
I'm really happy with how it turned out and it is more appropriate for summer weather (although summer is almost over!) If you have any thrift store TLCs I would LOVE to see them!
 
My lack of posting does not mean there has been any lack of crafting in my life over the past few weeks, I just haven't had time to post anything. I promise to make the effort to post at least once a week with some craft or project I have done!

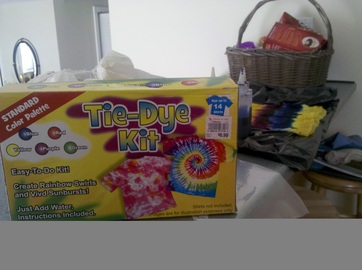
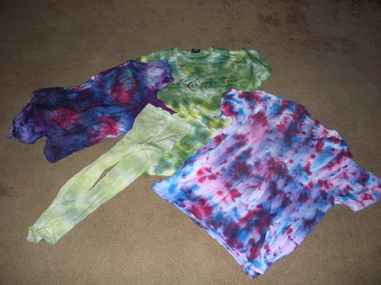
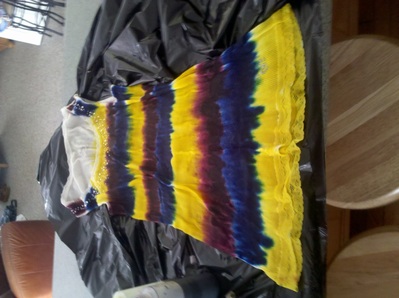
Aside from posting laziness, I have been doing crafty little projects with the girl I nanny (mentioned in the previous tie-dye post) and currently we are having a great time recycling a crap-ton of old magazines I have. I think that has to be one of my all time favorite things about DIY: the opportunity to repurpose anything! So in the fashion of recycling and magazines I decided to share some of my favorite magazine projects, all of which I've tried, in the hopes that you will find a new purpose for the stacks and stacks of People and Star you most likely have lying around. Without further ado...

MAGAZINE MADNESS

Picture

Decoupage!

Picture
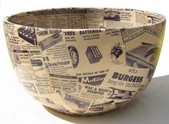
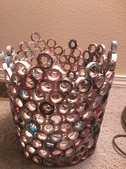
Probably the easiest thing you can do with magazines. Just grab a plain looking item (it can, literally, be anything) a pair of scissors, some Modge-Podge and an array of your favorite magazines. Snip, arrange, and seal and you have turned a blah looking bowl (or table, or mirror, or anything) into a fabulous and one of a kind piece of art. I've decoupaged vases, mirrors, and a copious amount of picture frames. Plus you are recycling two things at once!

Magazine Bracelet

Picture
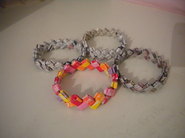
we've all seen these done with starburst wrappers, but why not do the same with some magazine pages. This is the same technique I used to make my news paper belt

Magazine Beads

Picture
I spent an entire day making a fair amount of these babies. I keep them in my craft drawer (one of many I have in my room) to utilize in any project that may pop into my mind. I love these because no two are alike!

Magazine Bowls

Picture
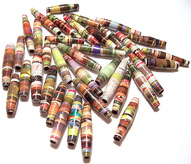
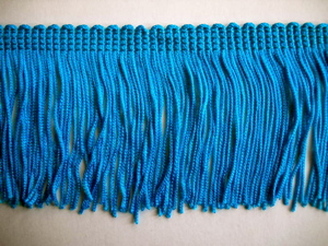
Probably one of my favorite things to do with magazines. I have made a couple of these and they are super easy and super durable. They also require alot of time and alot of magazing pages, so if you have some time on your hands and a butt-load of magazines you want to recycle, this is a perfect project to try!

Magazine Bag

Picture
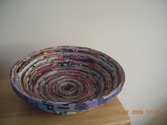
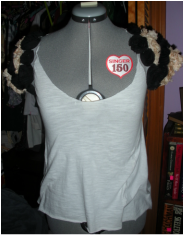
I tried making one of these - once upon a time - and it definitely did not come out as nice as this one -> which Milan I. shared on Cut Out + Keep. This project requires alot of patience (something I was running out of by the end of mine). I would love to attempt this again, which should be reasonable considering how many magazines I posses!

Magazine Trash Can

Picture
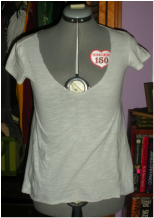
this is the project I am currently working on, and boy is it tedious, but that doesn't mean it isn't a blast to work on. I wouldn't start this project unless you have alot of time and a ton of magazines! I've been working on it while nannying for the past 3 days and I'm a little under 1/2 way done. The only question I have is about its durability. Once the project is done I will share it and let you all know how it works!

 
For those of you who know me, you know that I nanny for a marvelously wonderful little girl during the summer. one of the greatest things about her is she L-O-V-E-S to craft almost as much as I do, and we spend most of our days rummaging around the house and searching online for projects to try. We've done friendship bracelets, pony-bead necklaces and those fun little bowls you can make out of rolled up magazine. One year we even made a news paper dress! perhaps if I can locate the pictures this might be a creation I can share with you!

Anywho, last week our fun-filled craft-tastic project was TIE-DYE! and what was even better? the kit cost 7 bucks at Christmas Tree Shop (oh dear lord, don't I just love those damn bargains!)
Picture
The kit came with:
                                - 5 different dye colors (red, blue, green, yellow and purple)
                                - 5 squeeze bottles to distribute the dye in (with covers so that you can store and use again)
                                - 2 bags of soda ash
                                - 6 pairs of really crappy plastic gloves
                                - A plethora of elastics
                                - Directions and design suggestions

did i mention this thing was only $7 Bucks!

Picture
so after hours of dyeing our shirts as well as our hands I created two dyed shirts for myself and a pair of dyed tights as well as a T for my man! but the crown jewel of TIE-DYE was created by Katie (the crafty kid I get to chill with all day). She decided to for-go the traditional techniques of twisting and srunching and created a masterpiece!
Picture
I'm so jealous I may have to make myself one!
Luckily I had some dye left over and my cousins and I will be tie-dying tomorrow evening some more, so I may have some more  creations to share with you!
 
So I am one of those people who loves hand-me-downs, and thrift store shopping, and it seems that one of the items I constantly collect is flannel button ups. A few weeks ago I went through all my shirts deciding what to do with them, and finding a loveley red one handed down to me by my brother I decided to save the fabric and re-invent it into a skirt! Just click on the image and try out the how-to! Good luck and if you try this how-to I would love to have you share it with me!
Picture
 
Picture
Although I haven't posted too frequently the last two weeks - and haven't put up a new how-to in roughly the same amount of time - that doesn't mean I haven't been crafting. I've spent the last few weeks surfing some of my favorite creation websites and blogs and trying out some of the DIYs and How-Tos I've seen. Below are a couple of my favorites, the links to the website/blog, and a sample of my creation based off of the DIY inspiration. Enjoy!

 
So Sorry for the lack of posts over the last two weeks. My graduation party is coming up and I have been exceedingly busy assisting my parents with all the festivities.

Fortunately I have the day off tomorrow meaning I can put up a huge post of projects I have been working on based off of other creafter's DIYs. I will show you what DIYs I LOVE and how they have worked for me.

I also have a tutorial I need to create for a skirt recycled from a flannel shirt - sort of a kilt-ish kinda of look. Keep an eye out for that in the not to distant (fingers crossed) future.

But for right now, I wanted to share with you something I am super excited about. The Fabulous Carly J. Cais over at the Amazing blog Chic-Steals included my Ballet Flip Flops in a section of her blog called Links of The Week! I am super excited and honored that she included me!

Please, Please, Please, check out her blog and see all of the other amazing Links of The Week! For now I'm signing off but keep an eye out for some fabulous creations to come!
Picture