My classes at Emerson have recently started up, and as some of you know, I am a theatre education major, meaning a majority of my classes are hands on, and creatively stimulating. Currently I am taking a class on puppetry! It is a crafter's wet dream! Twice a week I sit in a classroom full of sewing machines, felt, pom-poms, yarn, glue - anything you can imagine - and craft little creatures! I show a lot of my flair for creating fashion on this blog, but this class gives me the opportunity to show you some of the other things I have a passion for creating! So for the next few months I will be posting -interspersed with other posts as well (I hope! Fingers crossed that I commit!)- the puppets I create and a little how-to on how I created them or what inspired me to create them!
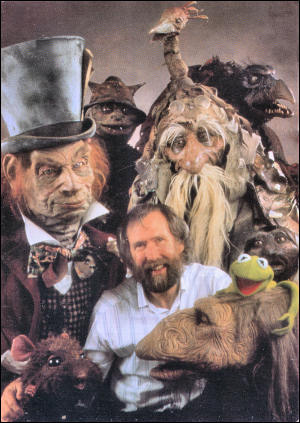
In honor of this endeavor I wanted to take a moment to pay homage to my favorite puppeteer, Jim Henson. I have be creatively stimulated (not in a creepy way) ever since I saw my first episode of Sesame Street. You'll see, in my next post, just how creatively stimuating and inspiring he has been! I also want to start thinking about how I can incorporate Jim Henson into Fashion! Keep an eye out for any DIY's that may come from that!
"When I was young, my ambition was to be one of the people
who made a difference in this world.
My hope is to leave the world a little better for having been there."
- Jim Henson
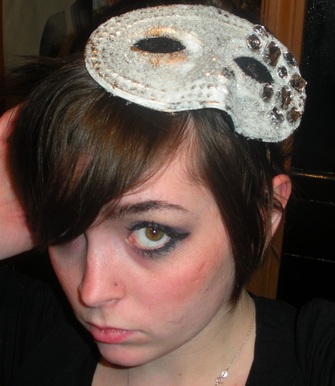
Just another How-To for you Lovelies! Phantom of the Opera Style...
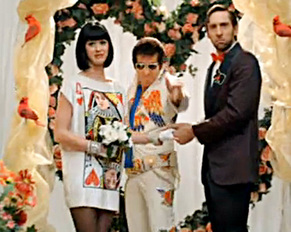
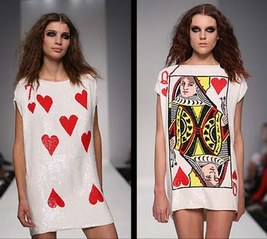
I am a Katy Perry fan. I always think her costumes are a lot of fun, and I'm pretty envious of some of the things she wears, but one of her outfits I have coveted the most was the card dress in wedding scene from the "Waking Up In Vegas" video.
The dress is from British Designer
Ashish's 2009 Spring/Summer Line, and it costs a pretty penny. Around $1,400!
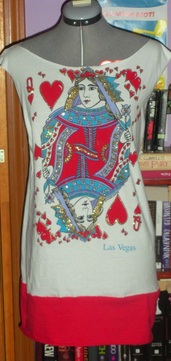
Obviously I don't have that sort of money to just cough up (although the dress is absolutely amazing). So I decided to make my own variation of the dress. Check out my How-To
here.
Wow. It's amazing how quickly time flies when you are super busy. One minute I'm crafting and posting and posting and crafting and then the next minute I'm so bogged down with homework, and working at B&N's, and attending classes that it's been a little under a month since my last post! So sorry! I'm guessing for the next few weeks my posts will coninue to be sparse as I finish classes and complete finals. The other thing that makes posting really, really difficult is that a majority of the items I have been crafting are christmas gifts for loved ones, so I obviously cannot post the how-to's until all the gifts have been recieved. Expect a load of posts after the holidays!
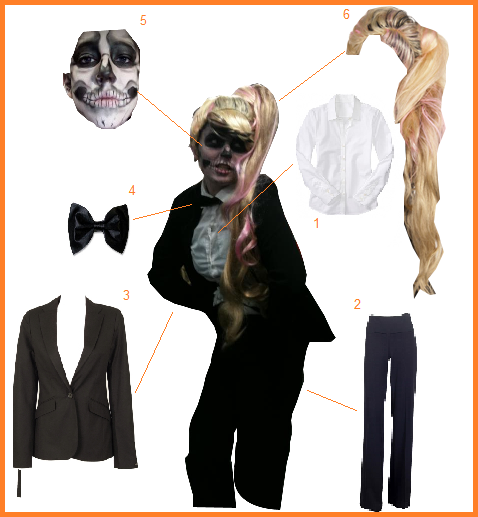
I did want to take a moment to share some how-to's for costumes that I have created over the last few weeks. This includes my halloween costume (Lady Gaga "Born This Way" Skeleton) and a costume for an 80's party (Rainbow Brite). Below you can check out the directions on how to create these costumes for yourself.
1. Grab a white button up. Make sure the buttons come all the way up on it because you will be adding a bow tie.
2. Black Dress Pants
3. Black Blazer. If you have the time (which unfortunately I didn't) you can add padding in the shoulders to make them more Gaga.
4. A black bow tie. I actually made mine out of black fabric, but you can get a bow tie pretty much anywhere
5. Grab some white grease paint and some black eyeliner and make your face into a skeleton. I used
Lizzeh's tutorial on Cut Out + Keep as a guide.
6. If you hair is really long, you can pull it into a side pony tail and spray it pink. I, myself, have short hair, but I found a great alternative! There is an official
Lady Gaga Side Pony Tail wig available on the web. I purchased mine on Amazon. It was really nice quality and well worth the money.
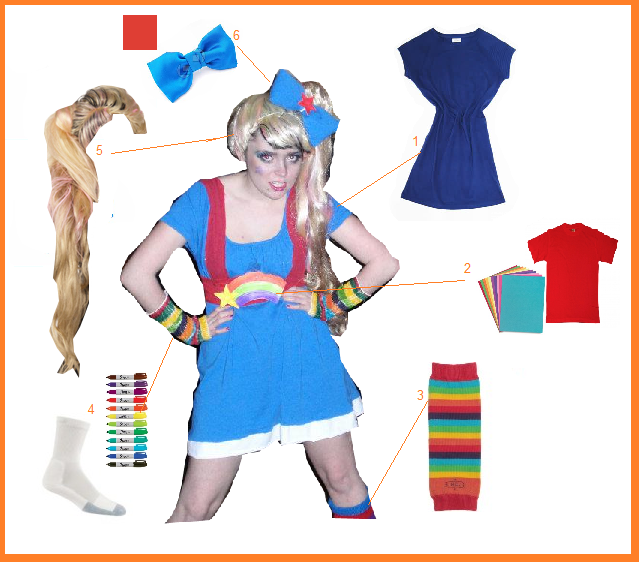
1. Grab a blue dress and white to the bottom. I purhased my dress at Salvation Army and used the hem on a white t-shirt to trim it.
2. Take a red shirt and make a belt with suspenders. Take some construcion paper and markers and make a rainbow. Super glue the rainbow onto the belt.
3. For the leg warmers you can also use rainbow tube sox, or follow the same directions I will outline in the next step. Spencer's sells the
rainbow leg warmers for $10.
4. For my arm bands I took a pair of white tube socks and used colored sharpies to color in rainbow stripes. You can use this same technique in place of the leg warmers, or you could purchase a second pair for your arms. Another alternative is to get rainbow tube socks and cut the bottoms off.
5. Lady Gaga wig strikes again. You could get any blonde wig with a side pony tail, or pull your hair up!
6. Grab a blue bow and some red construction paper. Cut out a star and super glue it to the bow. Tie the bow around your pony tail!
* don't forget to add a purple star to your cheek! *
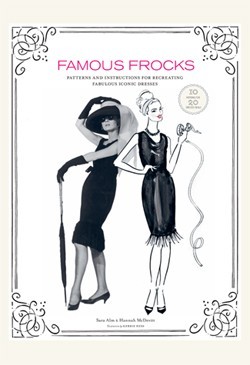
I have recently started working at Barnes and Noble part-time which could be potentially detrimental to my wallet. Fortunately I have stayed strong and avoiced spending and exuberant amount of money on books. In fact, I haven't even purchased anything for myself yet.... until yesturday. I saw this book and I had to get it:
It was the last one we had and I was a little freaked that if i didn't get it right then and there I would never find it again! It's such an incredible book. It has iconic women wearing some of their most iconic dresses (twiggy, marilyn monroe, jackie O, madonna, and the list goes on and on). The book contains directions on how to re-create these "famous frocks" with suggestions on variations and fabric suggestions to make the look your own. The best part is the book also contains the patterns for each of the dresses! I literally screamed for joy!
The only thing that makes me sad about getting this book? Since I am so busy at the moment I wont have a chance to try anything in it for a little bit. :(. I'll have to contain myself until I have the proper amount of time to work on these little beauties.
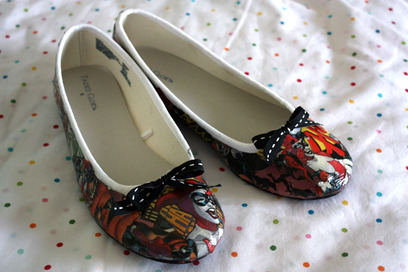
Sitting on my shoe rack in my room is a plethora of black high heels. Heels I hardly wear. Cheap black heels that I have bought for a magnitude of occasions. I don't really own any other color high heels, and I was getting pretty bored with the basic black, so I have been customizing a few. My recent creation is inspired by a how-to I found on
Cut Out + Keep a little while back!
Harley<3Quinn created these
comic book flats using images from a comic book and some modge podge.
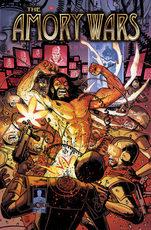
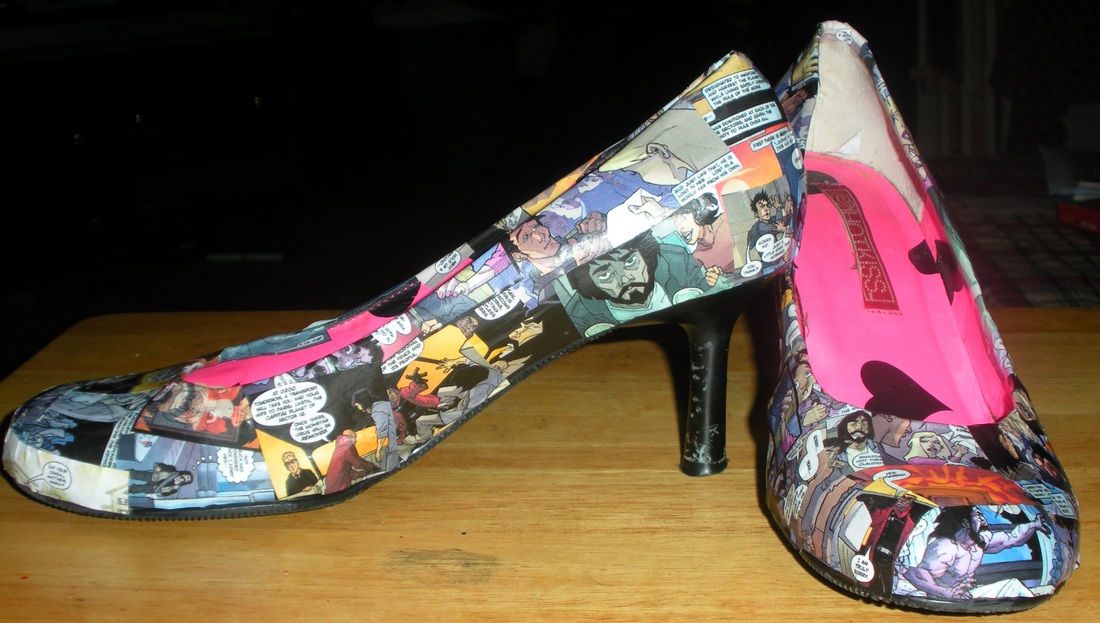
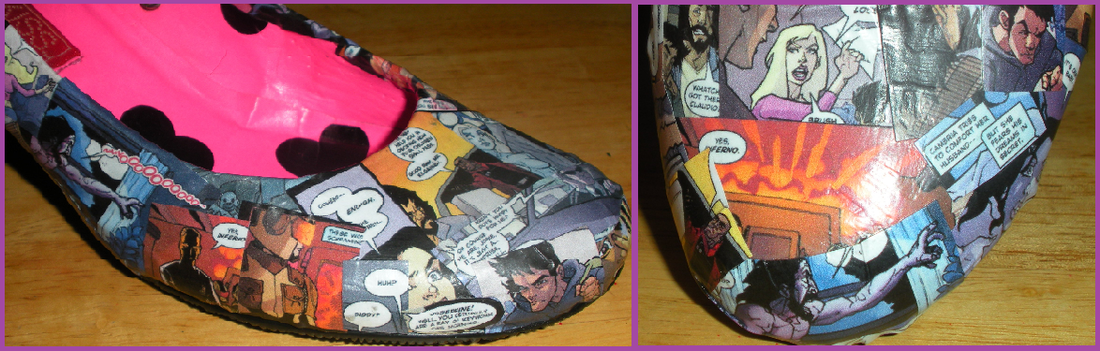
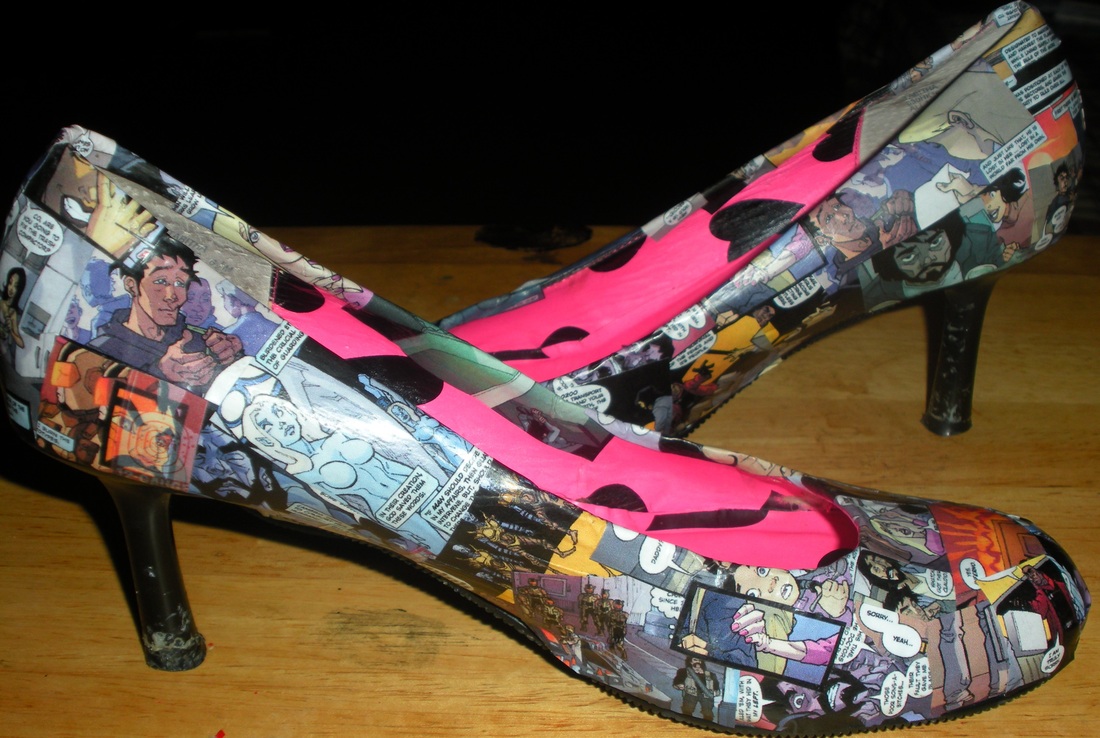
I was inspired to create my own comic book shoes using a pair of my boring old black high heels. But when it came down to deciding what comics to use their was no question what images I would use. I pulled up google search (because there was no way I was destroying my own comics!) and printed out some images from the Amory Wars by Claudio Sanchez!
I love them! They are super cute and one of a kind, but even better they are a tribute to my favorite band: Coheed and Cambria! I'm rocking my favorite musicians on my feet in true fangirl style!
Enjoy!
Thanks Harley<3Quinn for the How-To!
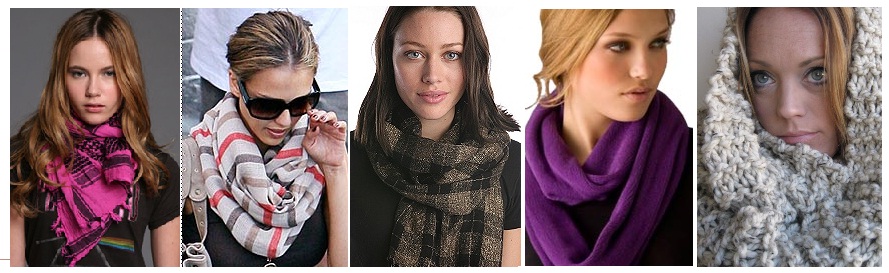
With Fall intruding upon the warmer weather it's time to start pulling out long pants, sweaters, and - my personal favorite - scarves! I, myself, have far to many scarves to count - chunky scarves, silky scarves, scarves to keep you warm, and scarves that will highlight any outfit, scarves knitted, furry scarves, shawls and pashmina's - but that hasn't stopped me from whipping up another one.
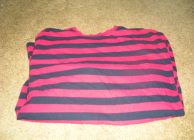
I am my family's clothing recycling bin. When someone has a t-shirt, or a sweater, or a pair of jeans they no longer want I inherit them! About two weeks back my brother plopped a few shirts on my bed that joined the countless others which make up my fabric bin. One of the shirts in particular was a black and red striped long sleeve shirt.
I loved the pattern so much that I decided to make it into a scarf. I am really into infinity scarves right now, and I thought it would be fun to see how much fabric I could salvage and how long I could make the scarf.
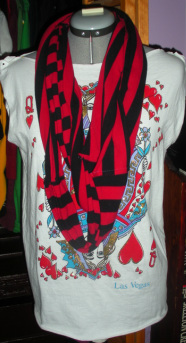
I am so happy with how my scarf turned out and it was super easy!
check out my how-to and try it out for yourself!
Pay no attention to the shirt beneath the scarf! It's an unfinished project that I am currently working on!!!
I realized a few days ago that I haven't updated my "
inspired by" page in a while. I've been pretty busy with grad school starting so I haven't had enough time to post a tutorial (I do have a few waiting in the wings though!!!) but I wanted to share one of the people - or in this case worlds - that I am inspired by and that is:
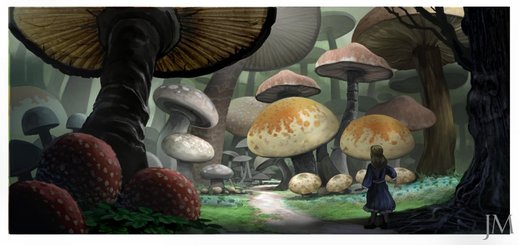
WONDERLAND
Alice's Adventures in Wonderland and
Through The Looking Glass by Lewis Carroll have always been two of my favorite stories and some of the most iconic images of Alice and her wonderful world have found their way into my creations. I love working with cards - Making playing card bows is one of my favorite things and I am currently working on a card inspired how-to! The
placemat purse I recently created has a very Alice-y vibe to it. And I find myself attracted to fashion with a bit of curious whimsy to it! I have a few Alice inspired DIY's on the backburner that I want to try out- so look for those in the future!
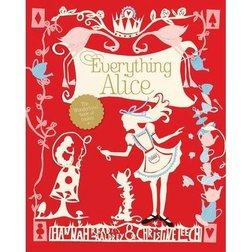
I also had to share a coveted item with you. I recently started working at Barnes and Noble and while on the job I found myself shopping the racks for craft books. Today I came accross this book:
It literally has everything, from food, to decorative items, to clothing! I MUST HAVE IT! Hopefully I pick it up soon and I can share all of my creations from it with you!
Thank you Lewis Carroll for the inspiration!!!!
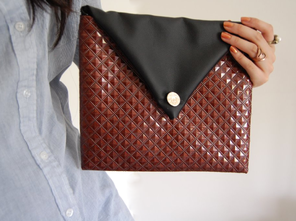
I've been meaning to post this for a while now but I haven't had the chance. A few weeks back I was on one of my favorite blogs
studs and pearls when I came accross a pretty cool how-to. Kirsten took a placemat an created a beautiful clutch out of it:
Isn't that great!??! I was so inspired by this creation that I began searching the stores for the perfect placemat to use to make a handbag. Then this glorious day came when I was in the Christmas Tree Shop (one of my favorite thrifty places!) and some lovely quilted placemats caught my eye. The best part? The placemats where two for a dollar. Two for a Freakin' Dollar!!! ... I bought Four.
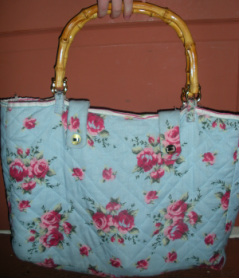
I didn't want to make a clutch because the magnitude of things I carry at one time would require a much larger receptical so I used all four of the placemats to craft a large purse. Then I ran out to Joanne's and grabbed a faux bamboo handle and threw everything together. This is what I came up with:
It's kinda vera bradley-ish and I love it! Thanks Kirsten for the inspiration!!!

 RSS Feed