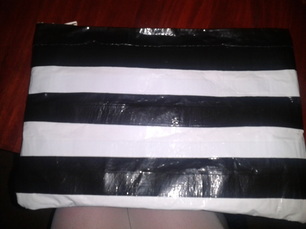
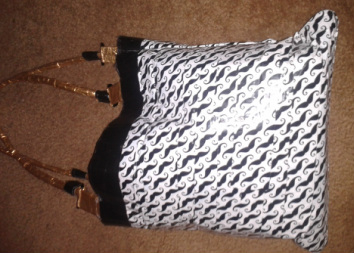
What is super durable, comes in a variety of colors and patterns, and is a crafters best friend? Why that would be.... DUCT TAPE!! The most famous being Duck Brand, that one with the cute little ducky on the front. If you don't have duct tape in your craft drawer, get it. Believe me, there is so much you can do with it! check out there website. they have a ton of different styles, colors, and patterns, as well as a how-to section! I picked up some duct tape a while back at 5 Below (for only 4 dollars a roll!!!). The main reason for the purchase? They had one with mustaches ALL OVER IT! I had to have it, but then I spent days looking at it saying to myself ... what can I do with this. Then bam! I looked at my beat up, well loved, purse and said, "you gotta go" and spent the next few hours crafting myself a bag. I had enough left over to make a little hand purse as well. And guess what lovelies? I created a HOW-TO so you can do it as well, and it's a two-fer: 1 how-to, two different bags! Check it out...
| |
A friend celebrated a birthday a few weeks ago. She is a swimmer and I wanted to make her something that would be useful for her!
I started thinking about making her a bag out of t-shirts that she could toss her wet swimming gear in, and then she could just toss the bag into the washing machine and clean it!
This is what I came up with! It actually came out very spacious and was super easy to put together!
|
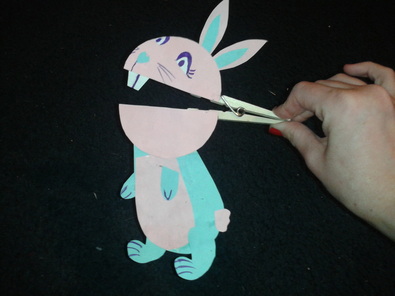
A few weeks ago I was enlisted by a friend to assist with a puppet workshop for elementary and middleschool students. I knew I wanted to do brown paper bag puppets as one option; they are easy and demonstrate that anything can become a puppet and a puppet can be made from anything.
But I wanted to have a second option for the older kids who may have already had experience with the brown paper bag puppets. I still wanted it to be easy and I still wanted it to showcase that puppets can be anything so I came up with this little guy: Isn't he cute? And he was super easy to make! Take a look at my how-to in the techniques section. It's a great idea for moms and babysitters on rainy days, and also for teachers. Speaking of teachers, I am thinking of starting an education page for my blog which will demonstrate ways to use certain how-tos in lesson plans. What do you think? Looking for more puppets? Check out my how-to for SOCK PUPPETS!
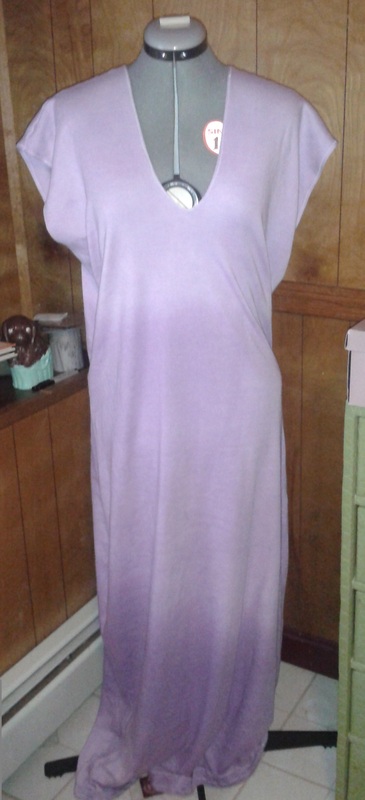
I had a wedding a few weeks ago (not my own, of course). My man was in the wedding (not as the groom, of course!) and naturally I wanted to match him - the wedding color being Purple (which also happens to be my favorite color! No way!) I also wanted to create my own dress and thought it would be an excellent time to try a how-to from one of my favorite blogs: Sweet Verbena. After creating the dress - An easy, breezy, beautiful (and super comfortable) maxi dress, I decided I wanted to try my hand at dip-dyeing and the ombre look. I experimented a little and was super happy with the results: I can't wait to try this technique with other articles of clothing! I've also created a How-To for the Ombre Dip-Dying Technique, if you are interested in trying yourself!
Also, check out the How-To by Sweet Verbena for the Boho Maxi Dress, she really deserves all the credit for creating such an excellent how-to for an awesome dress!
So sorry for the lack of posts lately. :(. As you know life can take crazy course. Although things have been hectic, I have been crafting a little. Mostly pattern inspired crafting, but I wanted to share them with you!
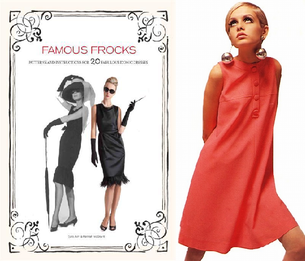
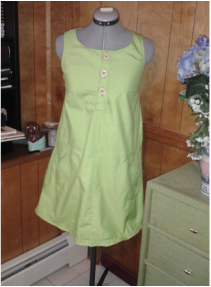
It seems that the dresses I have worked on have had a very Twiggy/60's/Mod feel. I even recently cut all my hair off in a short pixie style - Mia Farrow would be so proud! Away we go! the first dress I worked on was from a pattern I found in: Famous Frocks - a book I picked up a while ago and never had a chance to utilize! It's a really awesome book with easy to follow directions. I recommend it highly! | |
I really loved the final results! I made the dress out of a lime green broadcloth: that's another great thing about the book- each project gives a list of different patterns that would be suitable for the style of the dress. I feel so much like Twiggy in this gown:
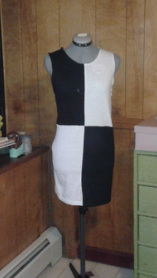
| The second dress I worked on was a black and white checkerboard dress made from t-shirts. I got the how-to from Rookie Mag. If you haven't checked out this website you NEED to. It's absolutely wonderful! The how-to which you can find here gave super easy to understand directions and the dress literally took me only an hour! Plus, who doesn't like a dress made of wicked cheap and outrageously comfortable cotton t-shirts. Antother thing I love, is that you could use virtually any combinations on colors. I went for the more traditional - this time! I would love to try making a neon one next! | | Once you have the mod dress down, you should also check out Rookie's tutorial for Mod eye make up. It is the final detail that really pulls the 60's look all together! Get the look here!
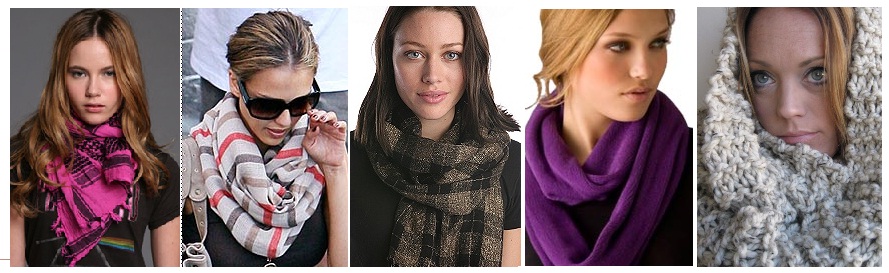
With Fall intruding upon the warmer weather it's time to start pulling out long pants, sweaters, and - my personal favorite - scarves! I, myself, have far to many scarves to count - chunky scarves, silky scarves, scarves to keep you warm, and scarves that will highlight any outfit, scarves knitted, furry scarves, shawls and pashmina's - but that hasn't stopped me from whipping up another one. 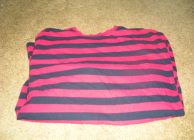
I am my family's clothing recycling bin. When someone has a t-shirt, or a sweater, or a pair of jeans they no longer want I inherit them! About two weeks back my brother plopped a few shirts on my bed that joined the countless others which make up my fabric bin. One of the shirts in particular was a black and red striped long sleeve shirt.
I loved the pattern so much that I decided to make it into a scarf. I am really into infinity scarves right now, and I thought it would be fun to see how much fabric I could salvage and how long I could make the scarf. 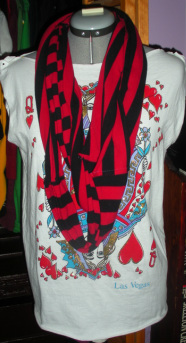 I am so happy with how my scarf turned out and it was super easy! check out my how-to and try it out for yourself! Pay no attention to the shirt beneath the scarf! It's an unfinished project that I am currently working on!!!
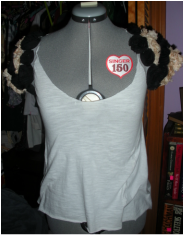
Flowy Flower Top I had some lovely flowers in pink and black and I had a vision of puffy sleeves! This is what I came up with!
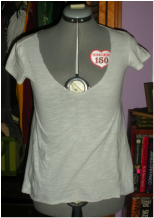 First I used my newly posted technique on how to transform a tight t-shirt into a flowy one. Once the shirt had the appearance that I wanted, I cut out strips of my flowers and arranged them in a formation I liked, pinned them down and then hand stitched them on. I'm really happy with the final outcome! Now I want to see what else I can stitch onto my shirt sleeves! Any suggestions?
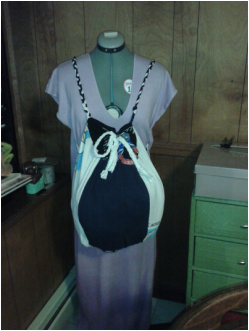
Boho Bag I am very, very sad. So deeply sad, and I will tell you why: One of my oldest, dearest, and bestest friends is leaving on a plane this friday for a three month stint in South Korea. In honor of her exciting trip, we had a going away / birthday party at the Olive Garden (YUM!) last saturday. While plotting the perfect bithday / please-don't-leave-me-i'll-miss-you-too-much gift, I found this lovely, tribal-y looking fabric and decided to make a boho bag for my friend! This is the how-to for the funky bag (which I am so HAPPY with!). I might have to make myself one!
My lack of posting does not mean there has been any lack of crafting in my life over the past few weeks, I just haven't had time to post anything. I promise to make the effort to post at least once a week with some craft or project I have done!
Aside from posting laziness, I have been doing crafty little projects with the girl I nanny (mentioned in the previous tie-dye post) and currently we are having a great time recycling a crap-ton of old magazines I have. I think that has to be one of my all time favorite things about DIY: the opportunity to repurpose anything! So in the fashion of recycling and magazines I decided to share some of my favorite magazine projects, all of which I've tried, in the hopes that you will find a new purpose for the stacks and stacks of People and Star you most likely have lying around. Without further ado... MAGAZINE MADNESS Decoupage! 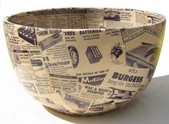 Probably the easiest thing you can do with magazines. Just grab a plain looking item (it can, literally, be anything) a pair of scissors, some Modge-Podge and an array of your favorite magazines. Snip, arrange, and seal and you have turned a blah looking bowl (or table, or mirror, or anything) into a fabulous and one of a kind piece of art. I've decoupaged vases, mirrors, and a copious amount of picture frames. Plus you are recycling two things at once!
 we've all seen these done with starburst wrappers, but why not do the same with some magazine pages. This is the same technique I used to make my news paper belt
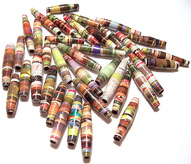 I spent an entire day making a fair amount of these babies. I keep them in my craft drawer (one of many I have in my room) to utilize in any project that may pop into my mind. I love these because no two are alike!
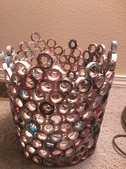
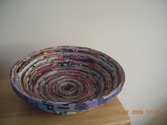 Probably one of my favorite things to do with magazines. I have made a couple of these and they are super easy and super durable. They also require alot of time and alot of magazing pages, so if you have some time on your hands and a butt-load of magazines you want to recycle, this is a perfect project to try!
 I tried making one of these - once upon a time - and it definitely did not come out as nice as this one -> which Milan I. shared on Cut Out + Keep. This project requires alot of patience (something I was running out of by the end of mine). I would love to attempt this again, which should be reasonable considering how many magazines I posses!
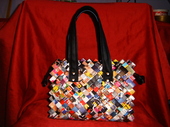
 this is the project I am currently working on, and boy is it tedious, but that doesn't mean it isn't a blast to work on. I wouldn't start this project unless you have alot of time and a ton of magazines! I've been working on it while nannying for the past 3 days and I'm a little under 1/2 way done. The only question I have is about its durability. Once the project is done I will share it and let you all know how it works!
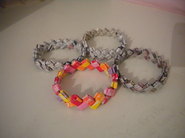
For those of you who know me, you know that I nanny for a marvelously wonderful little girl during the summer. one of the greatest things about her is she L-O-V-E-S to craft almost as much as I do, and we spend most of our days rummaging around the house and searching online for projects to try. We've done friendship bracelets, pony-bead necklaces and those fun little bowls you can make out of rolled up magazine. One year we even made a news paper dress! perhaps if I can locate the pictures this might be a creation I can share with you!
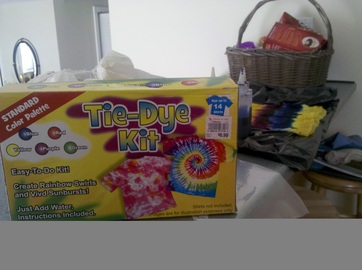
Anywho, last week our fun-filled craft-tastic project was TIE-DYE! and what was even better? the kit cost 7 bucks at Christmas Tree Shop (oh dear lord, don't I just love those damn bargains!) The kit came with:
- 5 different dye colors (red, blue, green, yellow and purple)
- 5 squeeze bottles to distribute the dye in (with covers so that you can store and use again)
- 2 bags of soda ash
- 6 pairs of really crappy plastic gloves
- A plethora of elastics
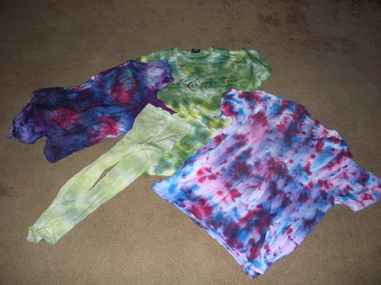
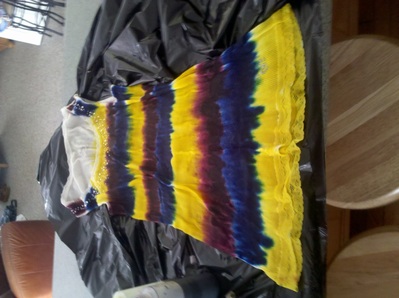
- Directions and design suggestions did i mention this thing was only $7 Bucks! so after hours of dyeing our shirts as well as our hands I created two dyed shirts for myself and a pair of dyed tights as well as a T for my man! but the crown jewel of TIE-DYE was created by Katie (the crafty kid I get to chill with all day). She decided to for-go the traditional techniques of twisting and srunching and created a masterpiece!
I'm so jealous I may have to make myself one! Luckily I had some dye left over and my cousins and I will be tie-dying tomorrow evening some more, so I may have some more creations to share with you!
|


 RSS Feed